Instances
The ZITADEL customer Portal is used to manage all your different ZITADEL instances. You can also manage your subscriptions, billing, newsletters and support requests.
Overview
The overview shows all the instances that are registered for a specific customer. You can directly see what kind of subscription the instance has and in which data region it is stored. With a click on a instance row you get to the detail of the chosen instance.
New instance
Click on the new button above the instance table to create a new instance.
- Enter the name of your new instance
- Choose if you like to start with the free or the pay as you go tier
- Choose your options (pay as you go)
- Data Region: The region where your data is stored
- Custom Domain: We generate a default domain ({instance-name}-{random-string}.zitadel.cloud), but you can choose you custom domain
- If our basic SLA and Support is not enough, you can extend it
- Check the summary
- Add you payment method (pay as you go)
- Return to Customer Portal
- Instance created!
You will get an email to initialize your first user of the instance and to access the new created ZITADEL instance.
Every new instance gets a generated domain of the form [instancename][randomnumber].zitadel.cloud
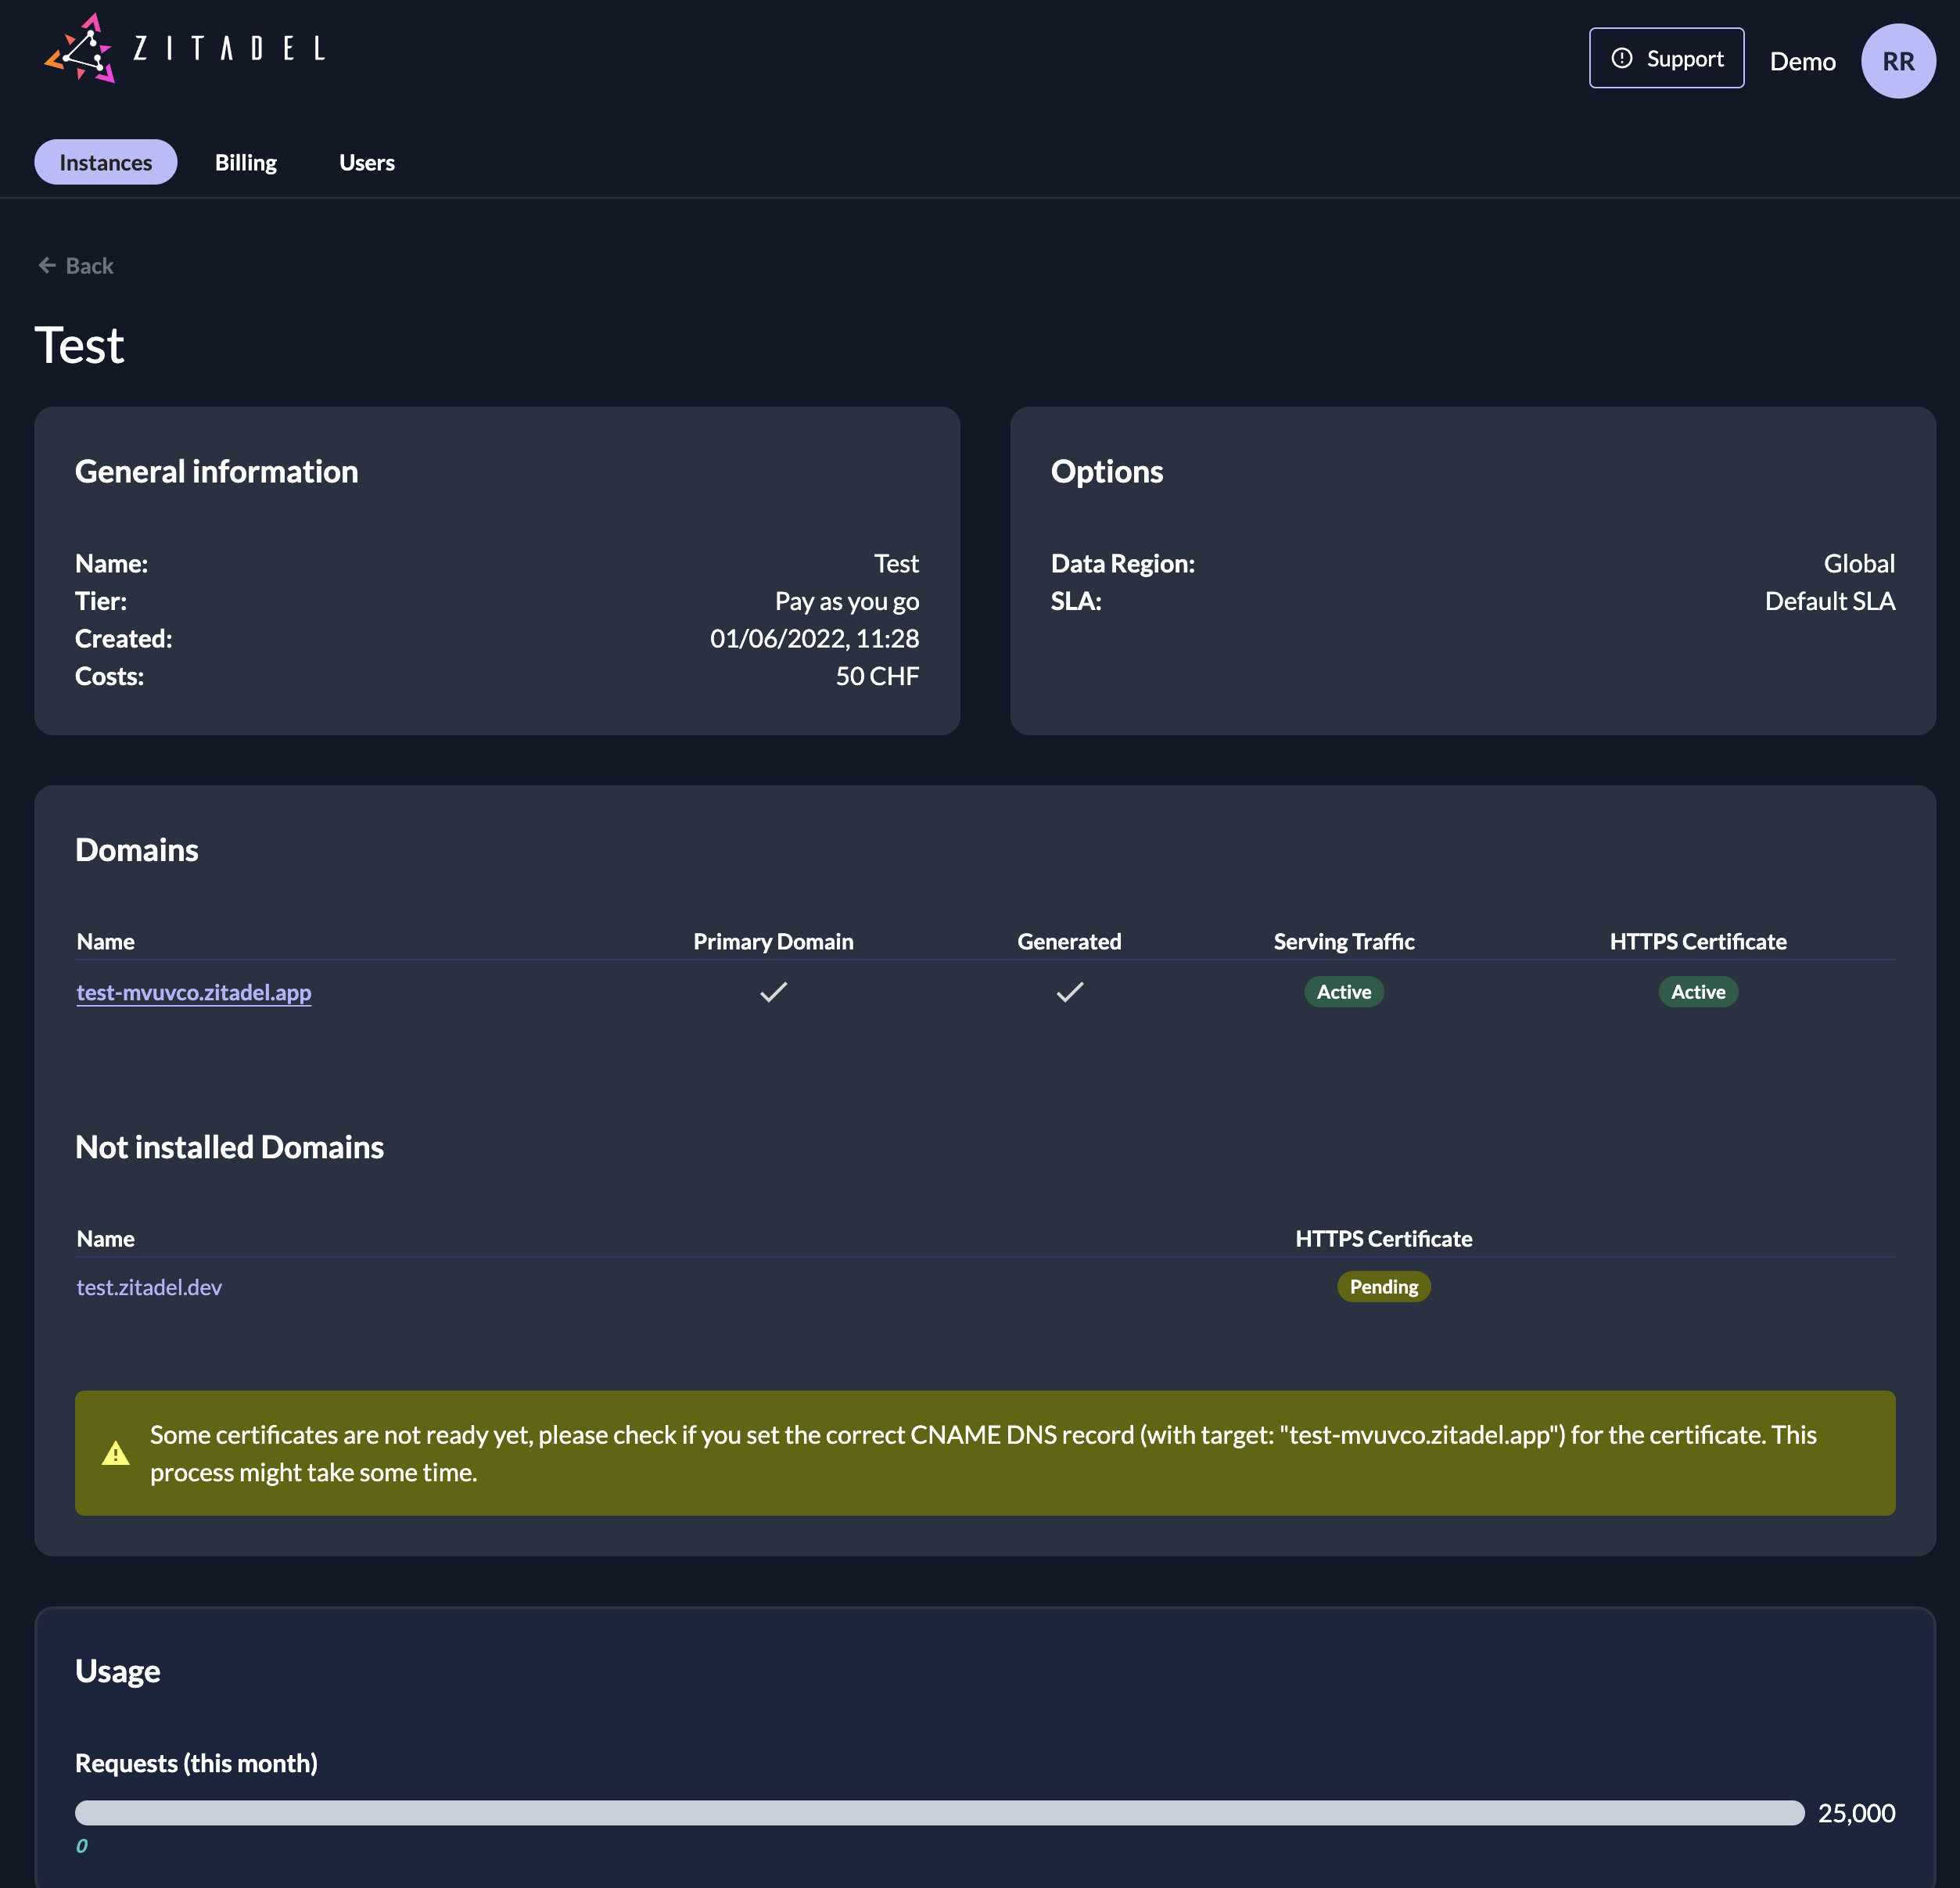
Detail
The detail shows you general information about your instance, which options you have and your usage.
Upgrade Instance
A free instance can be upgraded to a "pay as you go" instance. By upgrading your authenticated request will no longer be capped and you will be able to choose more options. To upgrade you must enter your billing information.
- Go to the detail of your instance
- Click "Upgrade to paid tier!" in the General Information
- Choose the options you need (can be changed later)
- Data Region
- Custom Domain
- Extended SLA
- Add a payment method or choose an existing one
Add Custom Domain
We recommend register a custom domain to access your ZITADEL instance. The primary domain of your ZITADEL instance will be the issuer of the instance. All other domains can be used to access the instance itself
- Browse to your instance
- Click Add custom domain
- To start the domain verification click the domain name and a dialog will appear, where you can choose between DNS or HTTP challenge methods.
- For example, create a TXT record with your DNS provider for the used domain and click verify. ZITADEL will then proceed an check your DNS.
- When the verification is successful you have the option to activate the domain by clicking Set as primary
Please note: Do not delete the verification code, as ZITADEL Customer Portal will re-check the ownership of your domain from time to time
Be aware that it has some impacts if you change the primary domain of your instance.
- The urls and issuer have to change in your app
- Passwordless authentication is based on the domain, if you change it, your users will not be able to login with the registered passwordless authentication

Verify Domain
If you need a custom domain for your ZITADEL instance, you need to verify the domain.
- Go to your DNS provider
- Add a new CNAME record (You can find the target on the detail page of your instance)
- After adding the CNAME you need to wait till the domain is verified (this can take some time)
You will now be able to use the added custom domain to access your ZITADEL instance
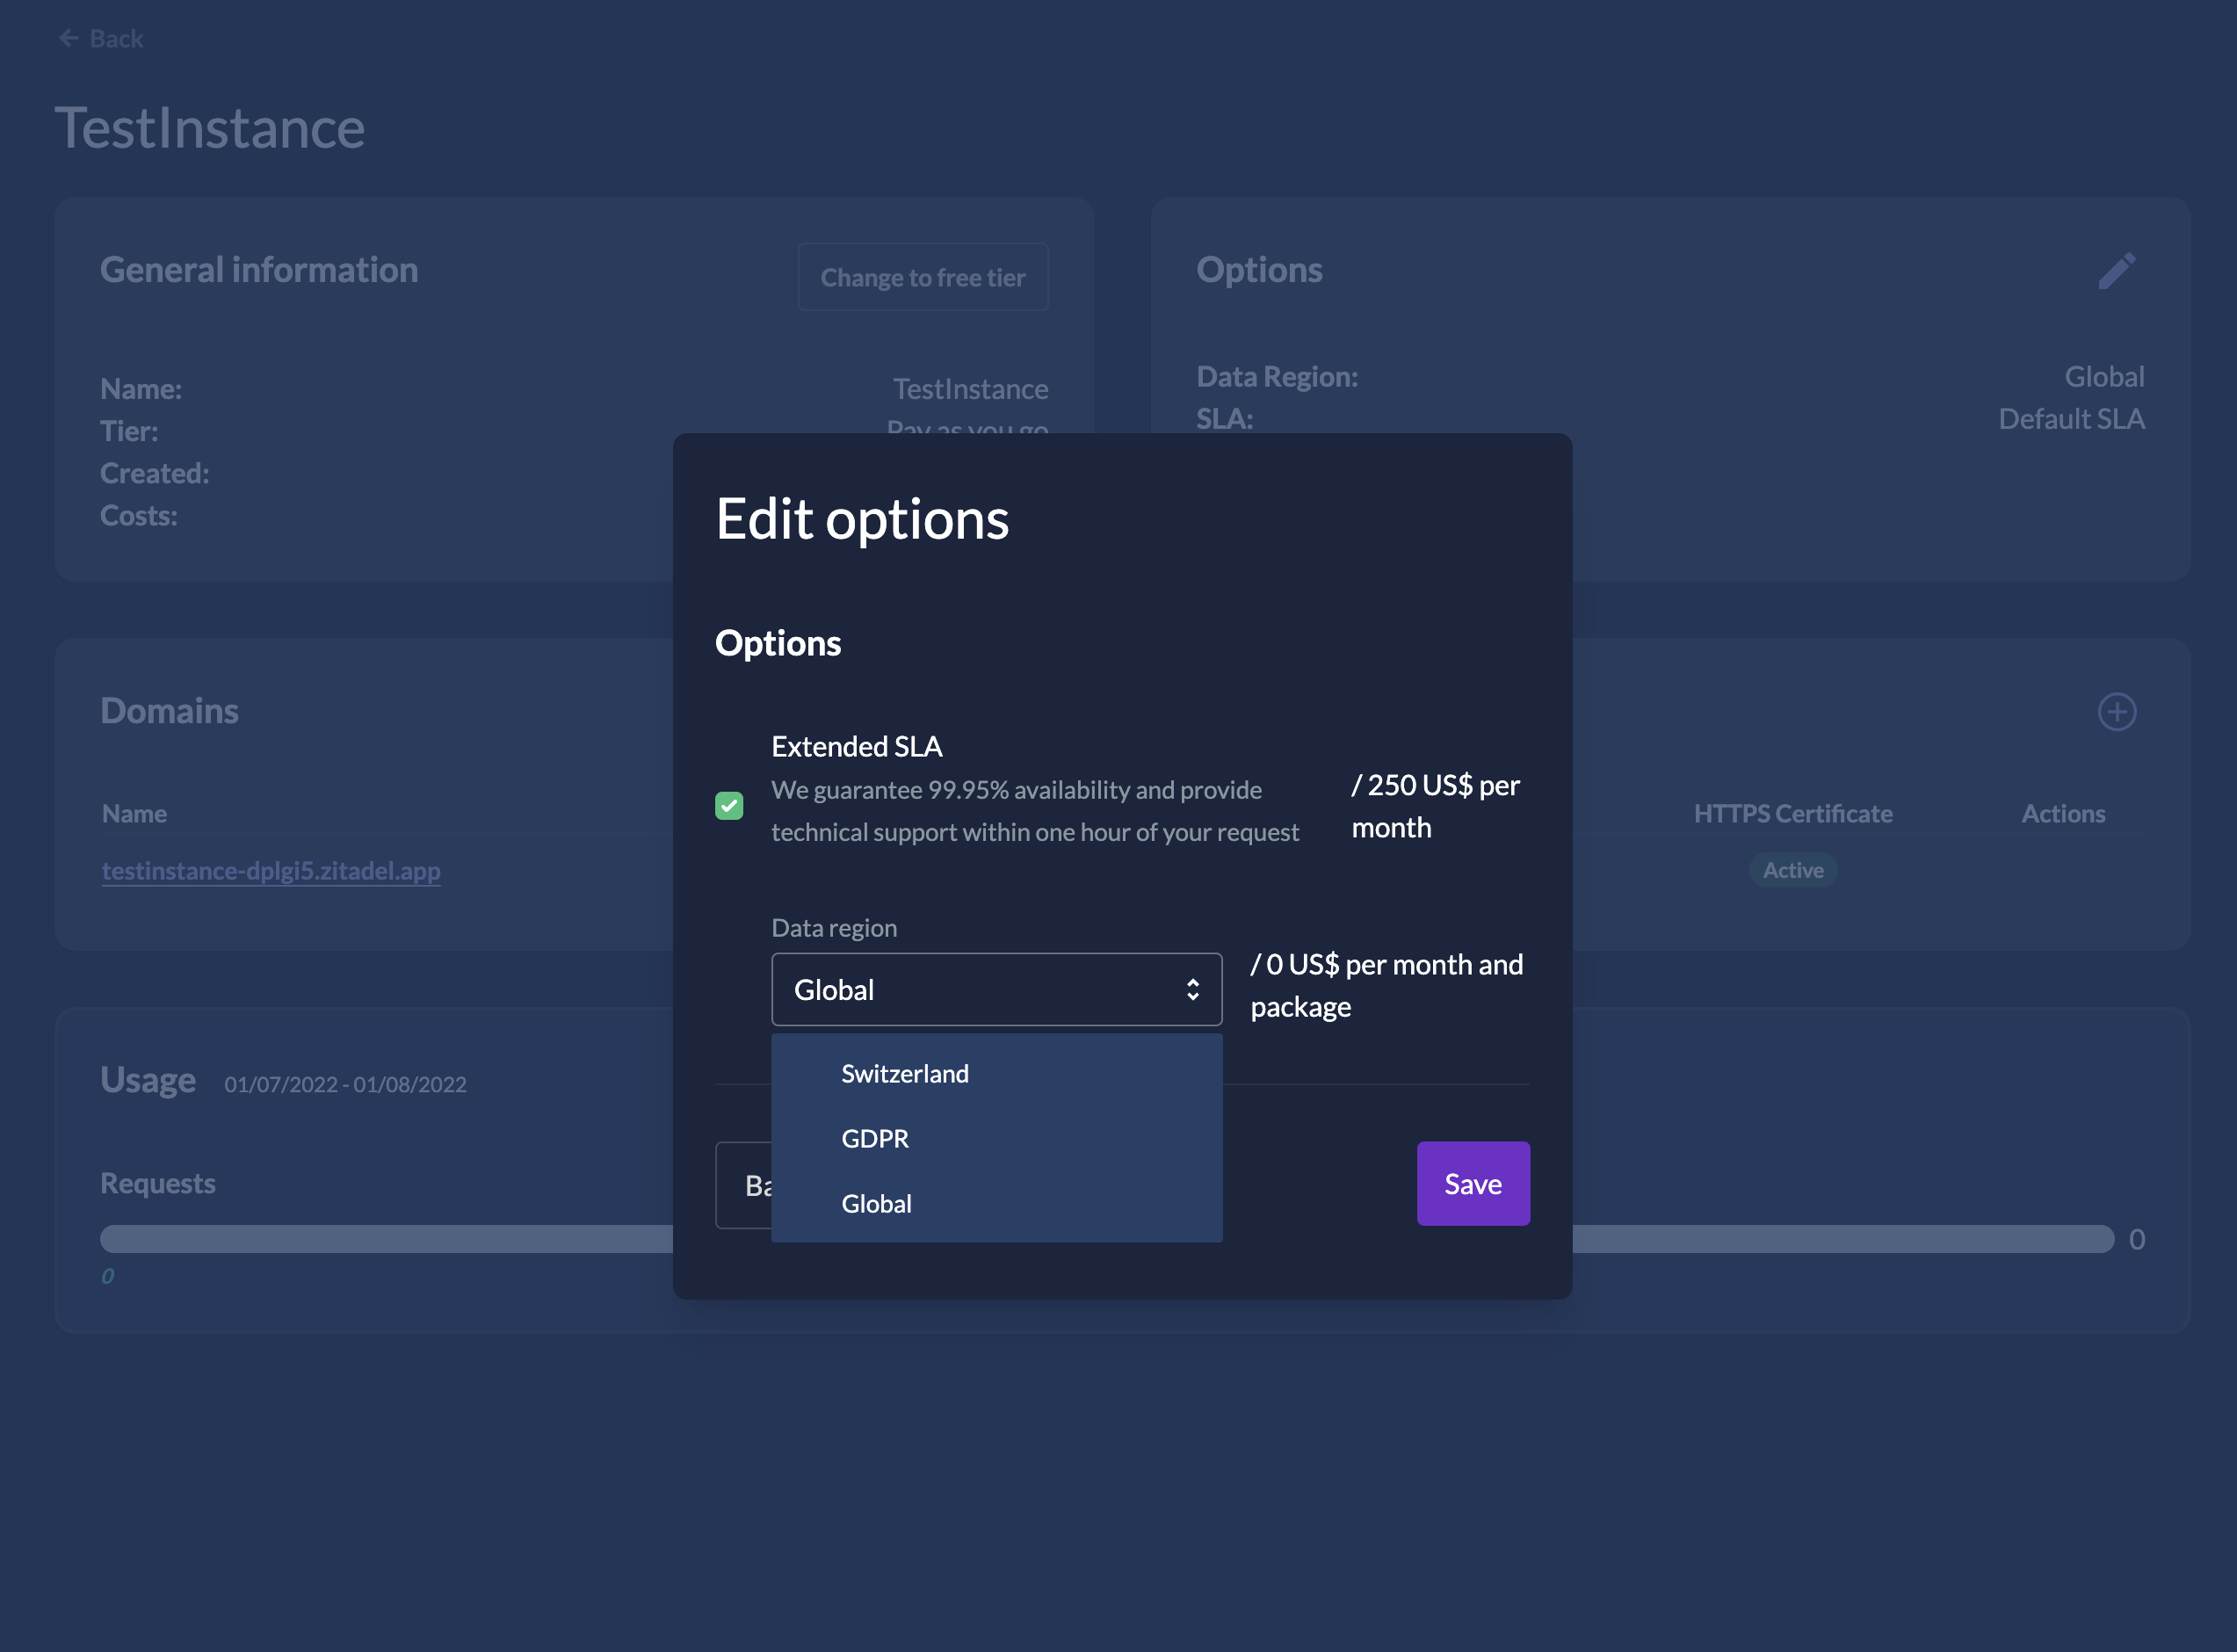
Change Options
You can change your selected options in the detail of your instance. This can have an impact on your instance cost.
- Go to the detail of your instance
- Click the edit button on the Options section
- Choose your options
- Extended SLA
- Data Region
- Save
Downgrade Instance
If you are in the "Pay as you go tier" with your instance, you can downgrade it to the free tier.
Be aware that this might have an impact for your users and application. If you have registered a custom domain, it will be deleted. The data region will be set to "Global", if you have selected something else.
- Go to the detail of your instance
- Click "Change to free tier" in the General Information
- You will see an overview of what happens when downgrading, click "Downgrade anyway"
- In the popup you need to confirm by clicking "I am sure"